It's that time of year! The time we make their summer uniforms!
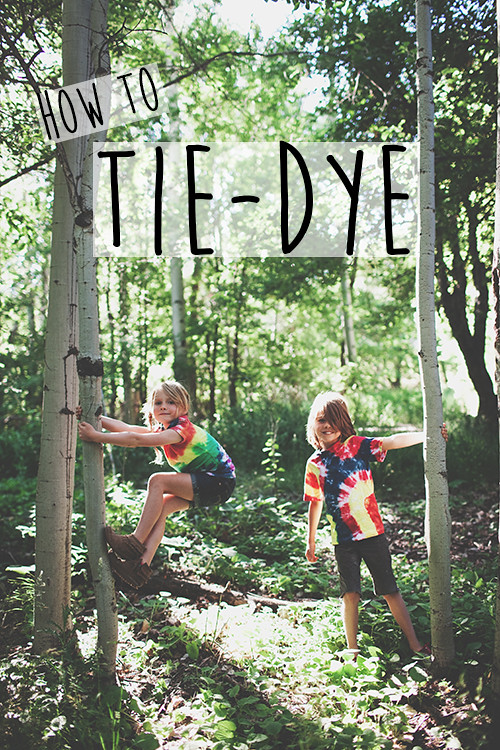
These two LIVE in their tie-dye all summer long. They play/camp/sleep/roll in the dirt/swim/hike/you name it in these shirts. And they really are the perfect summer shirt--they hide every popsicle drip/s'more smear/mud bomb....no one knows!
Two years ago we tie dyed for the first time--you can see my basic tutorial HERE. We have upped our game a little since then and this year we played around with some new designs.
Before/After Dying
-Your shirts should be damp. I always throw them in a wash cycle so all the extra water is spun out.
-After you're done dying, wrap your shirts in plastic wrap and let sit somewhere they won't dry out
(I recommend 24 hours).
-Unwrap them, cut the rubber bands off, and give them a quick rinse in the tub to get some of the excess dye out.
-Put your washer on it's largest setting (warm water) and a little bit of laundry soap. (Keep separate from your other laundry!). Wash and dry as you normally would.
You are READY!
You can make so many unique designs with just two basic techniques
Here's what we came up with:
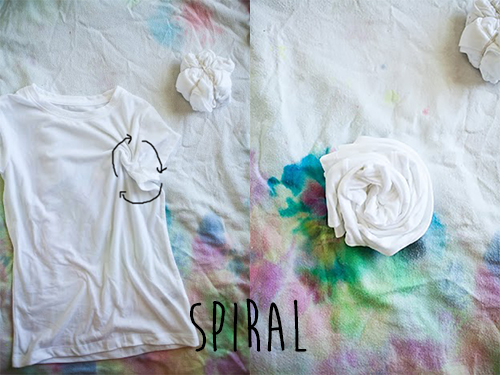
Spiral
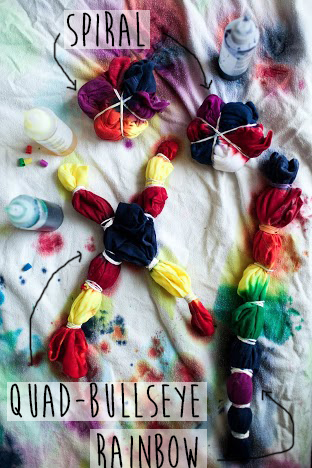
To make a spiral you pinch the shirt (anywhere!) and turn turn turn until it's all wrapped up. You then section it off with 3 rubber bands so you have SIX sections--like six pieces of pie. You'll then color each section (both sides) with a different color of dye.
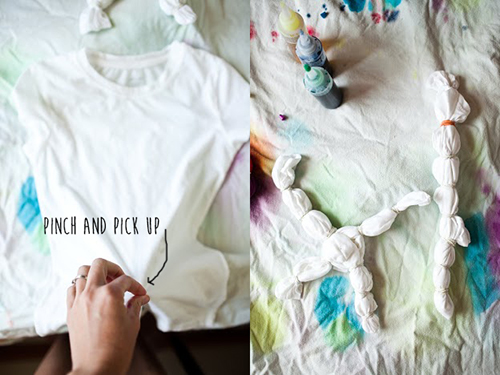
Bullseye/Rainbow
Pick up your shirt and pinch it (so you get the back side too). For a rainbow you'll pinch from the bottom, for a regular bullseye you'll pinch from the middle (see THIS tutorial), and for more than one bullseye you'll make several "arms" coming out. Section off with as many colors as you like (make sure the rubber bands are tight!)
TIP: Use Gloves!!
TIP: Use LOTS of dye. Saturate the fabric all the way through so your colors come out bold.
TIP: Use LOTS of dye. Saturate the fabric all the way through so your colors come out bold.
TIP: The box always says let sit 6 hours--the colors won't be as intense if you do it this long. We let ours sit 24 hours (it's so hard waiting to unwrap! but worth it)
TIP: Make your rubber bands as tight as you absolutely can!
TIP: Use an old white shirt. Lucy had to have a white shirt for a program at school and it only took a few times wearing it before it was dotted with stains and splotches....so we dyed right over it!
TIP: Mix colors right on the shirt. There are kits with 10 or more colors, but they usually cost more. Our kit this time didn't have orange, so I just put red AND yellow on the same section.
TIP: Mix colors right on the shirt. There are kits with 10 or more colors, but they usually cost more. Our kit this time didn't have orange, so I just put red AND yellow on the same section.
TIP: Let kids be kids! If you see my kids this summer, they will most likely be in one of these shirts. Would I like them to wear something else sometime? Yes. But really, who cares! As long as they are happy. In the past few years, thanks to Mr. Internet, kids seemed to have become more of an accessory for mom--always perfectly put together and ready for a photo op. Come on mom--let loose a little bit and let your kids be comfortable and happy this summer.
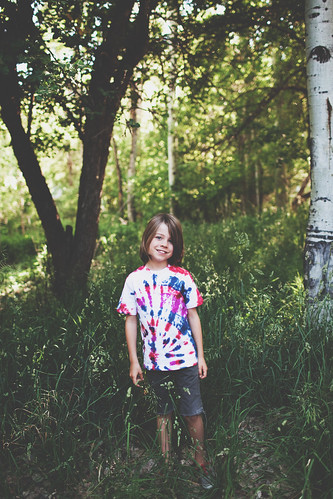
Patriotic Spiral.
He wanted to add a little purple in with the red and blue.
Leave one section white in your spiral.
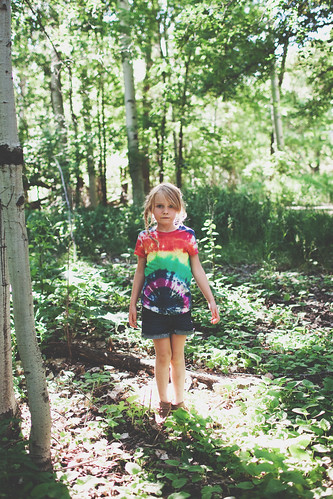
Rainbow.
She wanted blue above and underneath her "rainbow". I think leaving it white would be cute too.
Side Spiral.
Instead of twisting for the spiral right in the middle of the shirt, we went up top and to the side for a new design.
Quad-Bullseye.
Instead of pinching in just one spot--he picked four!
You can find tie dye kits at any craft store.
I've used these two and they were both great:
I've used these two and they were both great:
Jacquard Tie Dye Kit
Tulip Tie Dye Kit
I liked the Tulip because it came with dye IN the bottles, and then an extra dye packet of each color. Unless you are dying bunches of shirts and using up all the dye at once, I've found that after it's mixed, it doesn't keep well. I tried to use it a month later and the colors were very faded. So I liked that the dye came divided up so we could save it for later.
Happy Tie Dying!

